Thursday, February 28, 2013

Pretty Konad "Doily" Lace Stamping

Hey again!

Today I'm showing you some stamping I did a while ago when I swatched Essie Fifth Avenue for you here. Here we go!


As you can see in the photo, I used Konad's Special Polish in white over Essie Fifth Avenue. The "doily" lace pattern is found on Konad plate m57.


I really like this delicate pattern. It's not a full nail design pattern, but it's really nice to pretty up any manicure.


Super pretty, feminine, and elegant. There are so many colors this would look gorgeous over! Love it.

That's all for today! Thanks for reading! :)

Wednesday, February 27, 2013

First Attempt: Water Marble

Hey there!

Today I have something I'm actually quite proud of! My first ever water marble manicure! I had never tried this before, and I had only heard bad things about it. I'll admit, it's very difficult, but all of my hard work definitely paid off.

I used Wet 'N' Wild French White Creme as my base color, Wet 'N' Wild Haze of Love is the light pink shade (swatched here), Sally Hansen Nailgrowth Miracle Wholesome Earth is the burgundy, and the grey is Sally Hansen Xtreme Wear Wet Cement.


This is soooooooo pretty, and I'm so glad I finally decided to try this. I had a rough time at first and spent a while just trying to make swirls and shapes with the polish over the surface of the water before I even thought about putting my finger in the water.


Once I had my swirls under control, I taped up the skin/cuticles around my nails so I didn't have so much to clean up, and plunged my nail into the design-covered water.


When trying to achieve a successful water marble, make sure you clear away all excess polish from the surface of the water using either a toothpick or a Q-tip before you pull your nail out. I failed to do this once, ruining one of my nails.


And here's my right hand. It didn't come out as well as my left hand (especially my pinky), but I'm happy with it!


For my first time, this isn't too bad! I'll definitely try this again in the future!

Thanks for reading! :)

Tuesday, February 26, 2013

Rimmel Sunny Days Swatch and Review

Hey everyone!

Today I just have a quick swatch for you. I used this color as my base color for my last ikat print mani. You can see that post here. Let's get to it! 


This is the bright and shiny Rimmel 60 Seconds Sunny Days! I love this yellow. I've yet to find a yellow polish that isn't streaky and annoying... until I discovered Sunny Days.


This yellow is definitely very sunny and pretty. The formula started out a bit streaky, but built up nicely by the third coat. I added a forth coat just to be safe. The brush is pretty easy to work with, and I didn't need to do much cleanup here. This is just a really nice solid yellow creme.


If you don't mind layering on the coats, this is a fantastic yellow. Usually I'm a two-coater lover, but this is an exception. I'm glad I gave this a chance!

That's all for today! Thanks for stopping by! :)

Monday, February 25, 2013

Pretty Woman Magnetix Magnetic Nail Polish Swatch and Review

Hiiiiiii :)

Today I have another Pretty Woman product to show you. Here we go!

This is Magnetix magnetic polish! It comes with two magnets. One is straight diagonal lines, that I wore on my left hand, and the other is vertical wavy lines, that I wore on my right hand.


There was no name or number specifying the color, so I just know this is the purplish shade.


It took me a bit of time to get the hang of how long I should hold the magnet over my nail, how much polish to apply, and where I should hold the magnet. I concluded that the thicker the coat of polish, the better. The directions on the back of the box say to hold the magnet over the nail for 15 seconds, but I found I could hold it less than that or more than that to get satisfactory results. After playing around with it, I found that holding the edge of the rubber magnet on my first knuckle closest to my nail allowed for the best result.


The best part about this polish is the fact that if you don't like the result, just paint another layer of polish, and try again. I did that a couple times and had no issues.


Here it is with one coat of NYC Matte Me Crazy. I was kind of curious of how it would look matte, and my Sally Hansen Dries Instantly is deceased, as you saw yesterday.


Here's my right hand, sporting the vertical wavy lines created by the second magnet.


And here it is matte. RIP fast-dry topcoat.

I really liked using this polish, and there's so much you can do with it. You can hold the magnet any way you want to get interesting lines at different angles, but for swatching purposes, I wanted to keep things uniform. I definitely recommend trying a magnetic polish, whether it's this brand or any other metallic polish brand.

Thanks for looking! :)

Sunday, February 24, 2013

Fixing Old or Thick Polishes Update

Hey!

Today I just have a quick little update on that acetone/paint thinner trick I used on my sticky topcoat here. Just nine days have gone by and this polish has not fared well.


The polish is just so thick and hard to work with. You can see the bubbles on the brush, and the polish is so sticky, it's sticking to the mouth of the bottle, leaving some stuck to the brush. You can see the stretching polish in this photo and the one below. The sticky part between the brush and the bottle would stretch as I pulled the brush away until it was a very thin spiderweb looking thing, but I couldn't get it to photograph well.


Unfortunately, this little trick didn't fix my topcoat for as long as I hoped it would. I did use acetone, so maybe paint thinner would be better, which I don't have. Has anyone else done this trick? Any tips?

That's all for now! Good thing I have another topcoat coming in the mail from Sally's ;) Thanks for reading!

Saturday, February 23, 2013

Pretty Woman Velvet Flocking Powder Kit Swatch and Review

Hey everyone!

Today I'm going to show you my first fuzzy manicure! I picked up a kit at Rite Aid during this past week for $7.99, that contains a brush, nail polish, and "velvet" powder, which is basically flocking powder. Let's get started!


This is the outside of the package.


These are the directions and contents of the package. I followed the directions almost exactly. The only thing I did differently was I applied one coat of the polish to all of my nails at once. Then I applied a second coat to one nail at a time, immediately applying the powder and resuming the directions.


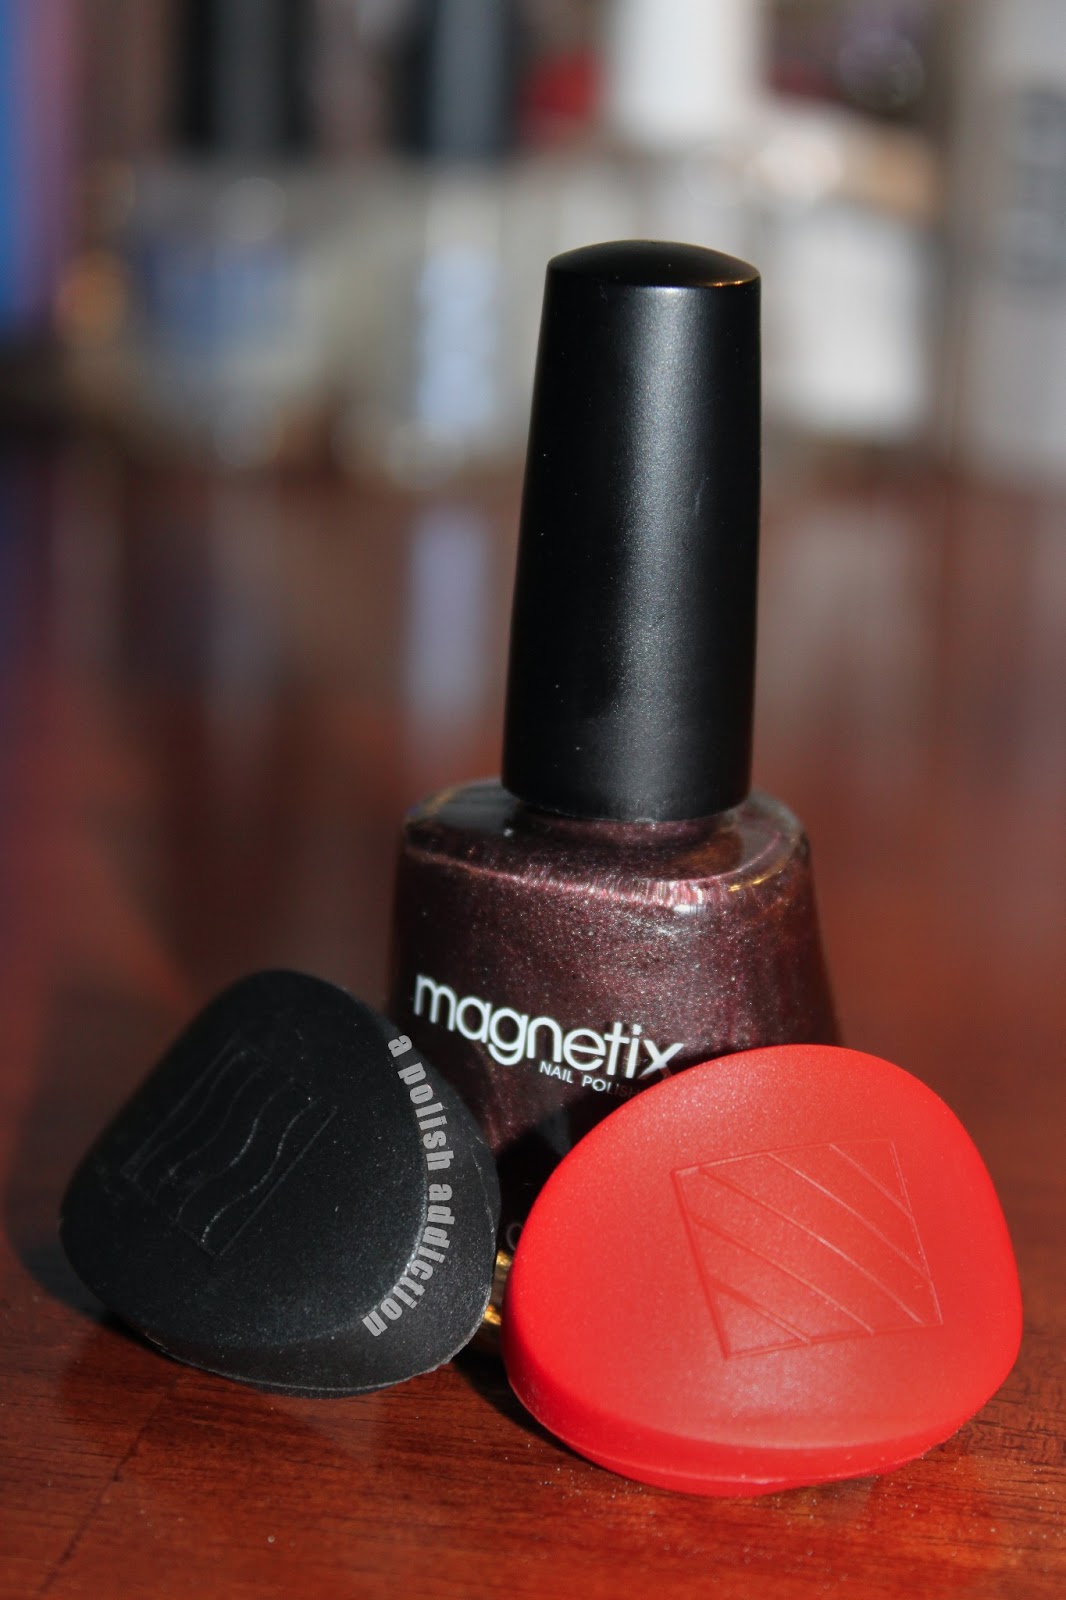
This is the polish. It's a sheer turquoise shimmer. This is only one coat. It was actually a nice, smooth polish to work with.


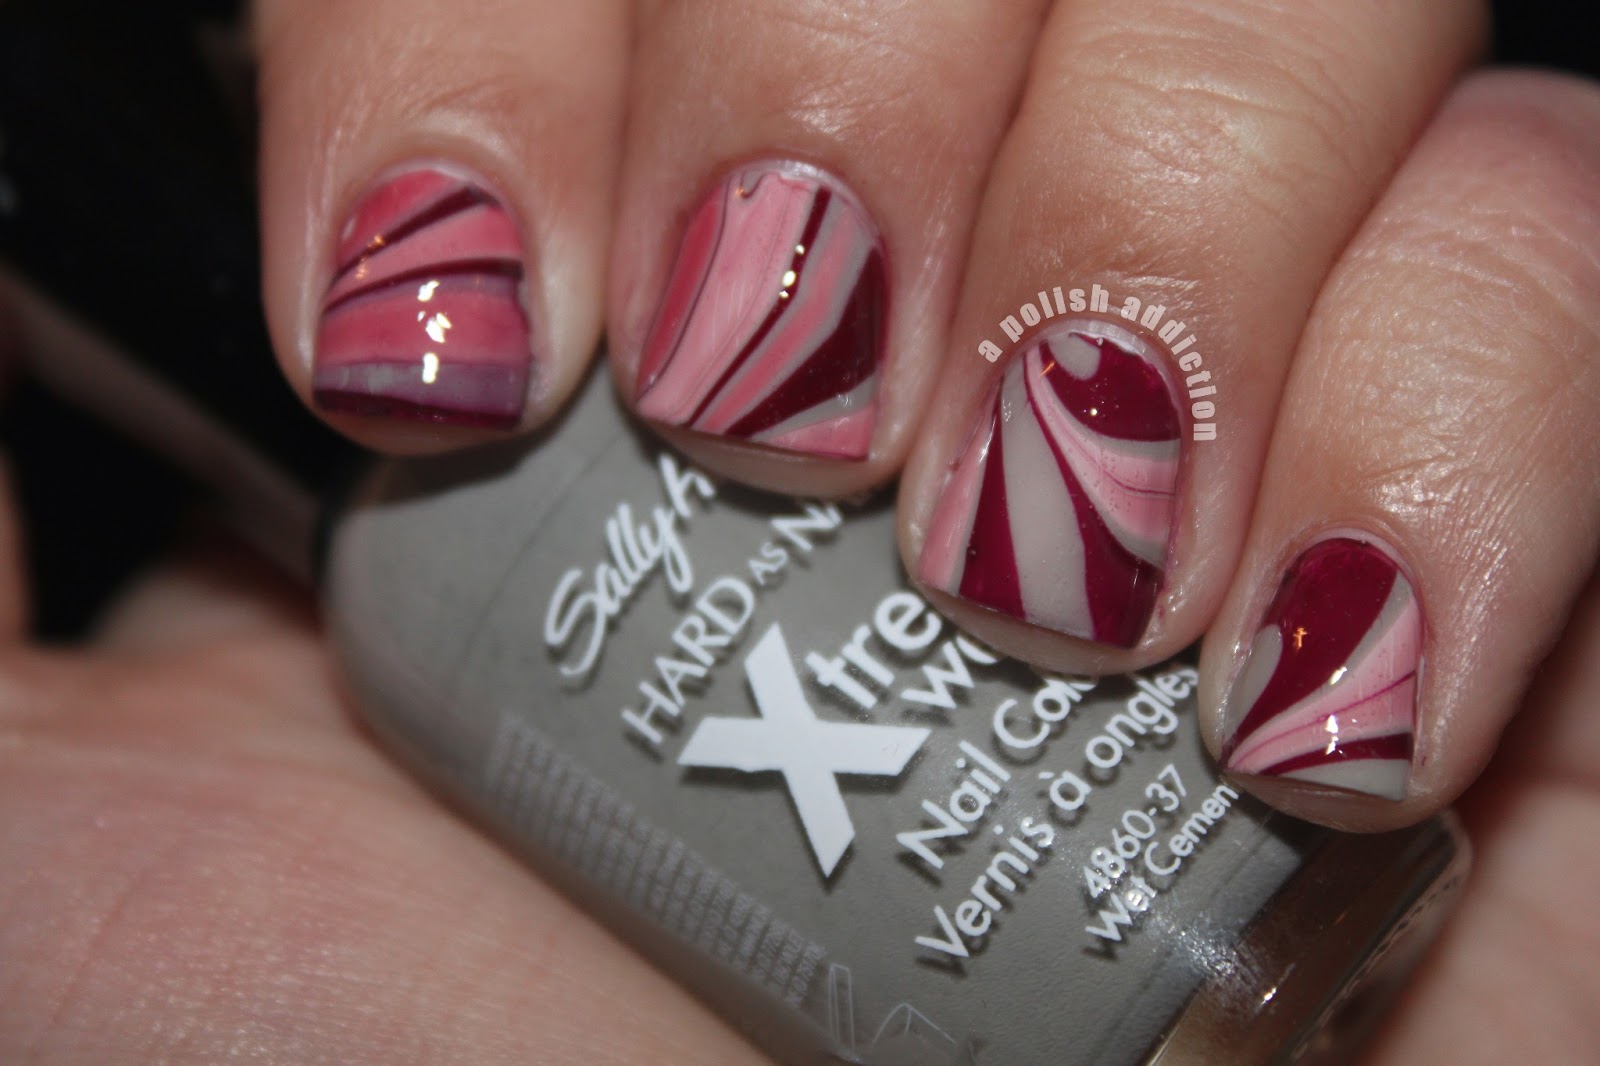
This is the finished product. I really enjoyed wearing this, but I did do some research on flocking powder, and for around $8 on amazon, you can buy a set of 12 powders in different colors. So, the value on this kit wasn't good at all. Unfortunately, I didn't realize how ripped off I was until afterwards.


For some reason, my thumb was the hardest nail to do. It doesn't look so bad in the picture though.


On the left side of my thumb was a bare spot, so I added a little bit more of the polish to that area and powdered it the same way I had before. After I brushed away the extra powder, I was left with a darker spot, wishing I had just left that nail the way it was. Like I said, this was my first time doing this, so maybe I should have used a dab of topcoat instead.


And lastly, my right hand is making an appearance this afternoon. I was able to stay mostly consistent on all of my nails, which was good.

Overall, I have mixed feelings about this product. I think it was a good introduction to the world of flocking powder, but not really for the price. I'd much rather spend basically the same amount of money and get more powder, rather than getting a brush and polish. As I'm sure all of you do as well, I have tons of polish as it is, so I didn't need the included bottle. And, an old makeup brush could work well for removing the excess powder.

I definitely recommend trying this technique/style, but be sure to research prices and reviews and stuff. Don't make my mistake! Haha. Well, I hope this has helped anyone who's wanted to try this as bad as I have, and have fun with it!

Thanks for stopping by! :)

Friday, February 22, 2013

Wet 'N' Wild Fergie It's Gonna Be a Good Night Swatch and Review

Hey there!

Today I have a recent polish purchase to show you. I picked up Wet 'N' Wild by Fergie It's Gonna Be a Good Night at the beginning of the week, as well as some other cool things I wanted to try that you'll be seeing soon! Let's get started!


When I bought this, I was under the impression it was black and silver/gold glitters in a black jelly-like base. But, it has a very faint grey base (not jelly-like at all) plus those black and silver/gold hex glitters. The photo above shows only one coat. The glitters do not apply evenly, as you can see, and the formula is very thin.


This photo shows some more glitter that I dabbed in the bare spots. I really should have used this as a glitter topper, but thinking it had a black base, I didn't. I'll try have to try this polish again in the future as a glitter topper on maybe a grey or white base color.


This is the polish with one more coat, applied just like regular polish... no dabbing. I figured since I wasn't using a base color, I should try to darken up the faint grey base in the polish itself.


And just for fun, I applied one coat of NYC Matte Me Crazy on top. I like it much better like this!


All in all, I like this polish. It wasn't as horrible as my last Fergie purchase, seen here. That's all for today! Thanks for looking! :) Check back for some other cool purchases I've made this week!

Thursday, February 21, 2013

Guest Hands: Tuxedo Nails and Brief Tutorial

Hey everyone!

Today I'm going to show you some nail art I did on my sister's nails. Please keep in mind when viewing these photos that she does not enjoy nail polish at all. Nor does she partake in any sort of cuticle or nail care. She only lets me do her nails when I'm going to do "something cool" to them, and even then she has issues with sitting still. Haha. So, with that said, let's get started!


I began with one coat of OPI Nail Envy Original Matte as my base coat. I painted two coats of Wet 'N' Wild French White Creme over that, and used a small striper brush and Wet 'N' Wild Black Creme to create the "V" shape of the tuxedo and fill it in.


I used a very small dotting tool to create the buttons, and a small dotting tool to create the center of the bows. The outer parts of the bows were created using a medium dotting tool. When everything was completely dry, I added one coat of Sally Hansen Dries Instantly on top for a quick-drying shine.


I love this simple design, and it's super easy to do. Perhaps I'll rock this look on my own fingers in the future!

Thanks for looking! :)

Wednesday, February 20, 2013

Ikat Print Attempt #2

Hey!

Today I have some more ikat print to show you! I had tried this print based on a tutorial I discovered on Nails by Kayla Shevonne last month: my post seen here. I wasn't too big a fan of my work then, but this time, I'm happy with my results! Let's get to it!


For my base color I used Rimmel 60 Seconds Sunny Days. The white is Wet 'N' Wild French White Creme, the turquoise is Rimmel 60 Seconds Mintilicious, and the black is Wet 'N' Wild Black Creme.


I am so proud of this! It's not as sloppy as my last attempt, although it isn't as perfect as Kayla's, but I can only get better!


If you haven't noticed, I've been showing my right hand only. Sadly, I was refilling my smaller bottle of acetone and spilled some on my left hand! So, my left hand got quite runny and is pretty horrendous looking up close.


My middle and ring fingers, and the one side of my pointer, got the brunt of the spill, so they look pretty sad. If it weren't for this small tragedy, I'd be completely in love with this manicure. Ah, oh well. There's always next time!

That's all for now! Thanks for looking! :)

Tuesday, February 19, 2013

Maybelline Color Show Metallics Amethyst Ablaze Swatch and Review

Hey everyone!

Today I've got another quick swatch to showcase today. I also want to point out the new look A Polish Addiction is rockin' now! I've got a blue color theme going on here, some polka dots, and I like the new personalization of the page! I hope you do too. Anyway, without further ado, here is Maybelline Color Show Metallics in Amethyst Ablaze!


Amethyst Ablaze is a really pretty purple metallic polish. Just keep in mind that is photo is the most color-accurate. This polish is not as pink in person, as it appears here when photographed. The darker purple parts seen in the photos are very close to the true color of this polish.


I've only used this polish two other times (here and here), and the formula was quite thick and sticky this time around. I did those manis at the end of January and the beginning of February, so this polish should not have gotten thick and sticky in that short amount of time.


I haven't tried that acetone/paint thinner trick (seen here) on anything other than a clear topcoat, but I may try it on this polish. I was surprised at how the formula had changed so drastically in less than a month, when my first couple of applications were perfect. This was kind of hard to work with, but it still turned out well. And I do still adore this color, especially in matte!

That's all for now! If I decide to try the trick on this polish, I'll be sure to post about it! Thanks for stopping by! :)

Monday, February 18, 2013

Floral Stamping and Matte Glitter Gradient Nail Art!

Hi again!

The time has come to reveal the nail art I promised to you yesterday! I wasn't sure what I wanted to do, and I wanted to try different things with OPI Yoga-ta Get this Blue!, so I did separate manicures on my right and left hands. Let's get started!

I'll start with my right hand.


This is OPI Yoga-ta Get this Blue! (original post found here) with one coat of NYC Matte Me Crazy on top. The matte topcoat transforms this shimmery blue into a velvet-y blue. I really like it like this.


From there, I added Pure Ice Once Again and a silver glitter by Deb (no name). I alternated adding these glitters until my results were satisfactory.


I applied one more coat of Matte Me Crazy when the glitter was dry to even out the surface a bit and get that subtle glitter shine.

I really love this glitter gradient, and I'm wishing I had done this on both hands!

Now, on to my left hand.


I began by adding one coat of Pure Ice Strapless over the base color. The results of adding this fine royal blue glitter really changed Yoga-ta Get this Blue!. I liked the transformation, so I decided to add some pretty floral stamping.


If you look closely, you can tell I had some inconsistencies going on here with the stamping, but they look pretty uniform at a distance. I had never used this pattern before, which I believe is on Konad plate m60, and I usually have some issues with the white Konad special polish.


I enjoyed the results on my left hand, as well, but I definitely liked the glitter gradient better. Both hands featured very pretty and very simple designs, which is always good!

That's all for today! Hope you've enjoyed! :)

Sunday, February 17, 2013

OPI Yoga-ta Get this Blue! Swatch

Hello!

Today I just have a simple little swatch. The fun comes tomorrow, when I show off the nail art I did with this polish as the base color. This is OPI Yoga-ta Get this Blue!


Yoga-ta Get this Blue! is a really pretty blue shimmer polish. I've had this bottle for a really long time (a few years?), so it was a bit thick, but not totally unmanageable, considering how long it's been sitting. My swatch is two coats.


I'm surprised at how my fingers weren't stained when I removed this polish a couple days later. Usually dark colors tend to stain my cuticles a little when I remove them.


Just a really pretty deep blue with a blue shimmer. It's definitely going to spend just a little more time on my polish rack!

Stop back tomorrow for some stamping and other nail art featuring this polish! See ya then! :)